
Hisako Ogita's I Love Macarons is really a good book for beginners and improvers on macaron baking. After trying so many recipes ( even including master Pierre Herme's ) I found hers the easiest and clearest to follow. Of course, masters' advices have been adapted by me when following her recipe, too.
Mainly based on Hisako-san's recipe, here is the Florrie adapted version of macaron baking. As long as you follow this recipe, it'll be hard to fail :)
For the Macaron batter: for 24 pairs ( or 48 pieces, about 2-3cm per piece )
85g ground almonds
150g powdered sugar
3 large size egg whites, at room temp
65g granulated sugar
1 tsp vanilla extract, or seeds from 1/2 vanilla bean
After beating the egg whites, I separated it into two batches, and separated the powders in half as well. Then I added 15g sesame powder in one batch of powders, and add red color in one batch of the egg white, thus making two different batters ;)
The basic steps of making macarons are similar to most of the recipes: Tant pour tant => beat the French meringue => add powder in two turns and mix well => Macaronnage => Macaronner. While the baking part I used Pierre Herme's method: preheat the oven to 200C, put the macarons in the oven and immediately lower the temperature to 180C, open the oven door with a wooden spoon, and bake for 10 mins. Although I didn't use one more baking sheet or baking tray to separate the lower heat, it doesn't matter.
For the butter cream:
100g unsalted butter
40ml water
40g granulated sugar
1 egg
After making the butter cream, I separated it into two batches, put 40g raspberry puree in one batch and 2 drops of vanilla extract in the other, thus making two different cream fillings ;)
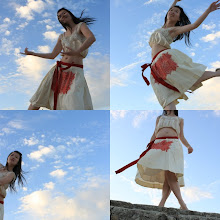
Here are the final products! The red ones are vanilla macarons with raspberry butter cream, and light brown ones are sesame macarons with vanilla butter cream. Aren't they cute! ^^

英国的冬天真的很长,关键是有阳光的日子太少;而现在,春风一吹过,草儿似乎一下子就绿了,花儿一种接一种的渐次开放,先是梨花,再是水仙,我最喜欢的樱花也很快要开了,到时又可以采来做盐渍樱花,春天真是美好的季节呀!
于是,活动慢慢也多了起来。我接到了第一个为party而做的甜点订单,做的是三种口味的马卡龙。除了最常做的巧克力马卡龙配黑巧克力甘那许夹心外,另两种分别是覆盆子果泥夹心马卡龙,和芝麻马卡龙配香草奶油夹心。
同时要向所有初学或者中级水准的马卡龙爱好者推荐日本的Hisako Oqita的小书《我爱马卡龙》I Love Macarons。如果不要求太富有创意的口味变化的话,这本书真是图片多多、浅显易懂,又一如所有日本书的风格一般,很贴心地概括了所有做马卡龙时的注意事项。比如,在把热糖浆从微波炉里拿出来的时候,不忘细细叮嘱你要戴上隔热手套。(也许不是所有人都像我这么大头虾,但是有时候我真的会忘记加热过的糖浆温度有多么高,而直接用手去拿的*_*)
那么在烤的时候呢,就结合了Pierre Herme大师的建议,用了这里提到的方法烤。结果是很成功的哦,看来以后想在最短的时间内做简单的马卡龙口味的话,用这个方子是最合适的了!

马卡龙面糊:可做直径约2-3cm的成品24个,即48片。法式蛋白霜做法。
85g 细细筛过的杏仁粉
150g 细细筛过的糖粉
3个大尺寸蛋白,室温
65g 细砂糖
1茶匙 香草精,或1/2条香草棒刮的籽
做法与所有马卡龙的经典步骤差不多:tant pour tant => 打好蛋白 => 加香草籽 => 分两次加入粉类 => macaronnage15次=>完成。学做马卡龙的同学都知道,这看似简单的步骤一点也马虎不得。这里就不一一细说了,如果哪天有空了再专门开个失败总结帖吧(不过lovedance一共失败了两次,从第三次开始才成功的,不知道这样的学习效率算高还是算低呢!)~
马卡龙香草奶油夹心butter cream,约能做200g
100g 无盐黄油,室温
40ml 水
40g 细砂糖
1个全蛋
香草精两滴
黄油室温软化(或微波炉低火转10秒),用刮刀拌成美乃滋状 => 糖加水放进耐热杯里,中火转1分钟,搅拌至糖完全融化,继续微波炉转4分钟,直到成品的糖浆滴进冷水里能用手形成糖珠 => 热糖浆的同时打发全蛋,然后把热糖浆徐徐倒入蛋中,一边打发一边倒 => 把蛋打发到颜色变白及手感沉重,拉起来能形成三角 => 黄油分两次加入打好的蛋,并用电动打蛋器确实保证打匀 => 整体打发到成顺滑的奶油状 => 加香草精 => 完成。
------------------------------------------------------------------------------------------
想要做口味变化的话,基于这个方子真的是很简单的,这也是我超喜欢这个方子的原因比如我把第一次打好的蛋白和粉都分两份,一份接着按程序完成,但是加上一点红色素,就变成香草口味但是表皮是红色的马卡龙,准备配覆盆子果泥夹心用;另一份的粉则加上芝麻粉15g一起过筛,最后就变成芝麻口味表皮是浅棕色的马卡龙。
而奶油夹心呢,也同样是在加香草精之前分两份,一份加入40g过筛的覆盆子果泥,就成了覆盆子奶油夹心;另一份加入香草精,或2茶匙的酒类,就可以变成香草奶油夹心或朗姆酒(橙酒杏仁酒咖啡酒。。。无论什么酒)奶油夹心,是不是很方便呢!唯一要注意的是果泥和酒都比较液态,搅拌时一定要确实拌匀,才不会分离。
最高兴的就是晚上的party,大家都对这些圆圆胖胖的小汉堡甜点赞不绝口^^
2 comments:
Thanks:) Hope to let you try it one day!
Post a Comment